

Results 1 to 1 of 1
Thread: Rhea News - Ages Three and Up
-
December 15th, 2014, 19:47 #1Won Hung Lo


- Join Date
- Apr 2003
- Location
- Nottingham, England
- Age
- 52
- Posts
- 139,548
- Blog Entries
- 3209
- Rep Power
- 50
 Rhea News - Ages Three and Up
This is a short explanation on how to install Rhea V3 properly Ill try to make it into a permanent page later on but for now this will have to do. Note: This is meant for people getting their Rheas soon, comments will most likely be ignored.
Installation is easy but not as trivial as with GDEMU. Youll need some wit and technical skills (nothing fancy though) and a soldering iron. Disconnect your Saturn, unscrew and remove the upper cover. Disconnect and remove the drive. It can be lifted a bit, I found it makes it easier to remove the flat cable that way, but be aware there might a thick wire or piece of copper foil screwed on top to provide better ground connection. Carefully disconnect that first (youll need a fine Philips head screwdriver).
You will need to locate +5V power supply spot on the motherboard and solder a wire there to provide power for Rhea. Unfortunately the connector is difficult to source and the original power cable is tad bit short anyway. Better yet route 2 wires, 5V and ground, but GND is somewhat optional as there are a few connections through the flat cable and that should be enough. Im not providing any pictures as to where to tap into 5V on the motherboard this is on purpose. I dont have good photos of all possible motherboard variants, and I want you to check that yourself using a volt meter. Best solder the wire on the opposite side of the PSU connector (or even PSU itself) but be aware its harder to do as there is plenty of copper to take the heat away and that makes soldering a bit more difficult. Rhea doesnt draw much, maybe 250mA with the card, so its not all that critical.
Rhea V3 PCB is clearly marked with what goes where when it comes to power supply, you have 4 holes: 2 upper ones are 5V, 2 lower ones are ground. You just need to solder to one of each. You can also install pins and make a connector if you wish for easier removal. See the bottom left corner of this photo:

I need to point out that Rhea can also be powered from external PSU (like wall cube or something), just make sure its got clean 5V output. Obviously that will need 2 wires. The nice thing about this setup is you can swap Rhea much easier and theres no need to solder to the Saturn motherboard. Its up to you though. In case of external PSU it needs to be plugged in first before you power on Saturn, and you can safely switch Saturn on/off for short durations while keeping Rhea powered. You can for example add/remove the 4MB cart during that time. Rhea, as long as its powered, will keep the selected image.
If you have a copper GND foil (or a wire), as seen on the photo, remove it. Its held down by a single screw. There is a risk it will come into contact with the voltage regulator on the back of Rheas PCB and cause a short. I keep it in my unit but then again I understand the risks of being careless
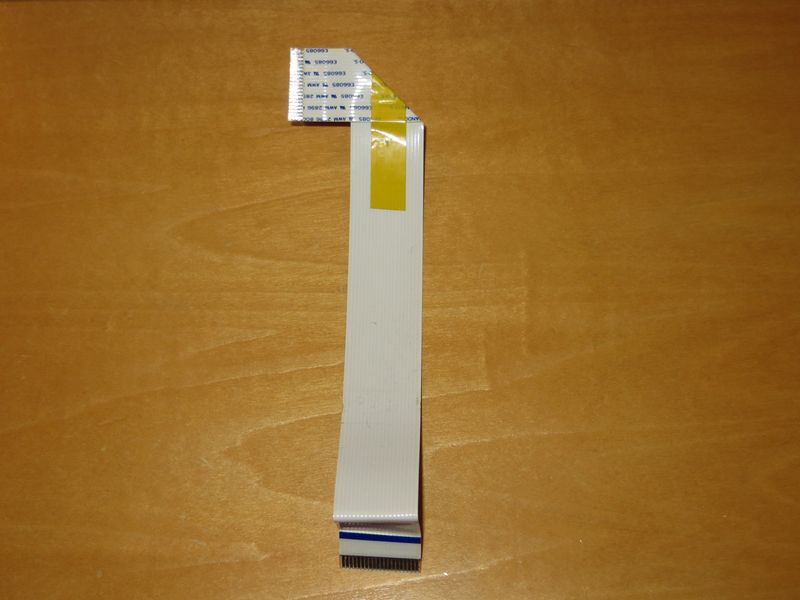
The photo above also shows how to connect the attached flat cable. Note it goes into Rhea conductor-side down. This is the reverse of most drives and its also on purpuse. The connector is much closer to front now and you can user either the cable provided, or the original one:

Just bend it in the middle (but dont flatten it, no need for that, theres plenty of room inside Saturn). Note that the original cable has clear ends, unlike the one Ive attached. The connector on Rhea is a ZIF, it needs to be opened by pulling the latch, the cable inserted, and then secured by pushing the latch back (which actually does require some force but not much). Make sure the cable is all the way in. Same for the motherboard side.
In case your Saturn model has the motherboard connection near the right side (rather than near the front) the procedure is the same, just twist the cable to make it fit. The plastic supports are optional but highly recommended, Ive included 2 and you can mount one (especially near the button) or both.
The FW is being worked on, the one in the units is already outdated and has known issues with some games (missing or cut short CDDA). Youll get upgrades once Im satisfied with the results.
Lastly, if there is anything unclear, ask me first. By email.
https://gdemu.wordpress.com/2014/12/...-three-and-up/


 Reply With Quote
Thread Information
Users Browsing this Thread
There are currently 1 users browsing this thread. (0 members and 1 guests)

Bookmarks