

 DCEmu Homebrew Emulation & Theme Park News
-
DCEmu Reviews Latest News
by Published on February 1st, 2011 23:16- Categories:
- PC News,
- DCEmu Reviews

XCM XFPS Storm Light Gun (PC)
Review by: TrialSword
Provided by: DCEmu Reviews
Manufacturer: XCM
Site: Buy from Play-Asia / Buy from Divineo China / Buy from Divineo France / Buy from ConsoleSource / Buy from GoldenShop / Buy from Amazon
Price: $99.00
Overview : XFPS Storm Light Gun brings first person shooters to a whole new experience. With the XFPS Storm, you can snipe your foes with precision aiming using this unique light gun. No more keyboard, no more mouse and having to rest your wrist with point and click. Simply point and shoot.
The Storm will support CRT, LCD, Plasma, DLP as well as Projector. It supports every gun shooting game on PC. Storm can be upgraded via software and is compatible with Windows XP, Window vista and Windows 7 operating system. Now you can enjoy gun shooting games with your LCD, Plasma or any other display you have.
Quality/Usability : The XFPS Storm Light Gun peripheral for the PC has one simple goal: to turn your first person shooters into a more interactive, contextual experience. With it, the player can aim, move, fire, and perform other in-game functions using an assortment of shortcut buttons and a very familiar motion tracking mechanic. Is this something to pull the trigger on, or should you check the safety first?
The Storm Light Gun sports a relatively safe design that champions utility over style. The grip is sizable and designed to hold with one hand. Attached to the side is a smaller grip that can be detached and appear very much like a nunchuk for the Wii. Shortcut buttons can be found here and on the gun itself, on both sides. This is aside from the two analog sticks, which can also be pressed in, and the trigger. The material feels sturdy but is a very benign, shiny blue plastic. Liken it to the look and feel of a shiny blue lego. Sleek is hardly the word that comes to mind, but despite the lack of flair I could not say that it is cheaply constructed.
The technology at work here is almost exactly that of the Wii. The Storm Light Gun comes packed with an IR sensor that could easily be mistaken for the same one packed with the Wii. It is intended to rest on top of your monitor, so make sure there's a home for it or that your monitor can accommodate. Both the sensor bar and the gun itself connect via USB, so two free ports are necessary to use the Storm Light Gun.
The good news is that this peripheral is completely plug and play. Once you've plugged it in, the IR tracking serves as a proxy for mouse navigation. The trigger is the left mouse click and the shortcut buttons can be remapped in-game as a regular gamepad would. The gun conveniently transfers the controls to most PC FPS games in an accurate, intuitive way: The analog stick on the nunchuk lets you move your character, the trigger fires, and you can aim your weapons by simply aiming the gun itself. If you have played any FPS on the Wii at all, one can easily gain a sense for what they will be turning their game experience on the PC into.
There are a few snags, of course. The IR sensors can be spotty at times, resulting in the player character reeling their aim into the far corners of the map, but when responding appropriately can provide a surprising degree of control and accuracy. In addition, the sensor bar requires that the player be about 3 feet from the monitor at minimum, which is further than many PC gamers are used to.
I tested the Storm Light Gun with a number of games:
- Call of Duty: Modern Warfare 2
- Battlefield: Bad Company 2
- Left 4 Dead 2
- Half-Life 2
For games with relatively simple control schemes, the gun provided a fun, new experience. Half-Life 2 and Left 4 Dead 2 accomodated especially well, requiring few button shortcuts and few opportunities in which you won't be running and gunning. For all the novelty, however, it never really crossed my mind that this could be a legitimate replacement control scheme for the games I was playing. This rings especially true for the more complex games, which require more context-sensitive button presses. Having both hands full with the nunchuk and the gun's grip also makes it somewhat cumbersome to even reach the buttons at times. Chances are, a player will be dead long before they have found the time to navigate to some of these buttons.
Because the gun is essentially a plug and play gamepad with IR tracking, it does not always perform the same for every game encountered. For instance, Modern Warfare 2 requires little in the way of shortcut keys and a simple mechanic for firing/aiming that accommodate the gun very well. Games like Battlefield: Bad Company 2, however, have many contextual button presses that would be hard to map or reliably execute with the gun, such as piloting any vehicles or arming/disarming bombs.
The obvious statement to make here is that anyone attempting to use this gun for multiplayer in lieu of a traditional keyboard and mouse will always be at a disadvantage for virtually every game they'd want to play. I cannot recommend it for any level of competitive ...by Published on February 1st, 2011 23:16- Categories:
- PC News,
- DCEmu Reviews

Razer Imperator Gaming Mouse Mice
Manufacturer: Razer
Site: Buy from Amazon / Buy from Razer (US) / Buy from Razer (Europe)
Price: $79.99 (US) / 69.99 (EU)
Overview : The Razer Imperator is not just a mere mouse, it is an extension of your hands. Its right-handed ergonomic form factor with a contoured thumb grip delivers comfort and a better fit for gaming, whether you use a palm or fingertip grip. Be empowered to take on foes and fatigue alike - for longer gaming sessions without strain.
When every aspect of your game matters, customize your game play with the unique adjustable side buttons, giving you optimum reach for easier access to mission critical keys and macros.
Ergonomic right-handed form factor with contoured thumb grip
The Razer Imperators right-handed ergonomic form factor maximizes comfort during intense and extended gameplay so you can outlast and outfrag the competition. The contoured thumb grip cradles your hand delivering increased control to low sensitivity gamers who often lift and swipe their mouse.
Adjustable side buttons for optimum reach
2 adjustable side buttons delivers optimum reach regardless of palm size or grip style; and for gamers who often lift their mouse or make rapid movements during gaming, the customizable buttons makes mission critical keys and macros accessible at all times.
5600dpi Razer Precision 3.5G laser sensor
The 5600dpi Razer Precision 3.5G laser sensor arms you with gaming grade precision and reliable tracking that will keep up with your every movement. Be it a small twitch of your wrist or a long range swipe to take out your foe, the Razer imperator delivers your every instruction with pinpoint accuracy.
Technical Specifications:
- Ergonomic right-handed design
- Adjustable side buttons
- 5600dpi Razer Precision 3.5G Laser sensor
- Razer Synapse On-board Memory
- Up to 200 inches per second / 50g acceleration
- Seven independently programmable Hyperesponse buttons
- 1000Hz Ultrapolling / 1ms response rate
- On-The-Fly Sensitivity adjustment
- Zero-acoustic Ultraslick Teflon® feet
Approx. size in mm: 123(L) x 71(W) x 42(H)
Hardware requirement:
- PC/Mac with USB port
- Windows® 7 / Windows Vista® / Windows® Xp or Mac OS X (v10.4 and above)
- Internet connection (for driver installation)
- At least 35MB of hard disk space
Quality/Usability : Although this mouse is mainly for PC/Mac and PC gaming use, this review mainly revolves around console gaming with the use of XFPS 4.0 Force for PS3 and Speed for Xbox 360. This can also be used with XFPS Rateup for PS3 and XFPS Sniper Plus for Xbox 360.
The Razer Imperator's box has a cover flap and when opened, it shows the mouse behind a clear plastic box/cover. Included with the package are separate instructions for both Mac and PC, pamphlets, as well as a coaster, stickers and a seal of authenticity.
The scroll wheel is fairly big and not small. The left and right buttons have a big clickable surface where your fingers and rest easily. Underneath are two more buttons that are used to adjust sensitivity on-the-fly. On the side are two thumb buttons and can be programmed. These are adjustable for those of you who have very long or very short thumbs. These are the only buttons that are adjustable. On the bottom of the mouse is a switch. As you move this up or down, the thumb buttons also move. Also on the bottom is a button labeled "PROFILE". This button is used for on-the-fly profile switching so you don't need to minimize or ALT+TAB out of your game to open the application. This button is only useful for PC/MAC use. There are some features that will not work on console games.
A cool factor about the mouse is that the logo on the front/top of the mouse pulsates and lights up. It does serve a purpose or anything except for the fact that it lets you know the mouse is powered. The scroll wheel also lights up blue as well. The USB plug has a gold plated USB connector, as well as the 7 foot long braided cord which allows for greater durability. No matter what your setup is, the 7 foot of cord is long enough.
Since the Razer Imperator is connected to the computer, its best that you download the software since you can use it as your new mouse for your computer. I'm not going to go through the whole process of installation and settings as its like any software install and some of the features that is used for PC game does not work for console. If you're interested in knowing more about this mouse for PC gaming, please do a search on this mouse as others have reviewed this witht he focus of using it for PC gaming. However, I will discuss some functions that will work for console game and settings. You can adjust the DPI up to 5600! That insanely high. You can also adjust the acceleration and polling rate (125Hz, 500Hz or 1000Hz), toggle whether you want the light on the logo to be ON or OFF and the same goes for the scroll wheel. The software allows you to check to see if there is any new updates if you feel your mouse is not performing well or if there is a bug. ...by Published on February 1st, 2011 23:16- Categories:
- PSP News,
- PS3 News,
- PS2 News,
- Nintendo Wii News,
- PC News,
- Xbox 360 News,
- Nintendo Gamecube News,
- DCEmu Reviews

XCM USB Vbox2 Advanced
Manufacturer: XCM
Site: Buy from Play-Asia / Buy from ConsoleSource / Buy from GoldenShop / Buy from Amazon.com
Price: $85.00
3x RCA RGB Component Video Splitter
Site: Buy from Amazon.com
3 RCA RGB Component Video Cable
Site: Buy from Amazon.com (3.3ft Monster Cable) / Buy from Amazon.com (6ft Generic)
Overview : Enable video game play on your laptop, netbook and desktop.
Fully Compatible with Xbox 360, Wii, PS3/PS2, PSP 2000/3000 series, Xbox GameCube or any device with component output. You can record gameplay, movie or take a screenshot of the gameplay to the hard drive so you can edit, use it as a wallpaper or record your gameplay for analysis. Compatible with Windows 7, Windows Vista and Windows XP.
Feature :
- Crystal Clear Picture Screen.
- Supports USB 2.0. Plug and play. Does not require any configuration
- Supports Streaming Video. Can be stored in multiple formats including: (MPEG-1/MPEG-2/MPEG-4/AVI/VCD/DVD/SVCD)
- Supports multiple picture file formats such as JPEG and GIF.
- Supports multiple input formats such as (NTSC/PAL/SECAM)
- Auto playback allows you to store in game action to your PC/laptop)
- Display settings can be adjusted such as Brightness/Contrast/Image Sharpness/Fullness/Color
- Supports Windows 7, Windows Vista and Windows XP operating systems
Quality/Usability : Whether you're a game reviewer or a gamer who just wants to record their gameplay to show off to friends, post on the web or even capture the greatest moments, you would need to point your camera at your TV or connect your consoles to a capture video card on your computer. XCM has released the Vbox2 Advanced. This is an updated version of XCM V-box for the Wii. The Vbox2 Advanced works not only for the Wii but for Xbox 360, PS3, PS2, PSP 2000/3000, Original Xbox and GameCube.
The Vbox2 Advanced comes in a well built, white shell and a fairly small adapter. The USB cord is approximately 3 feet long. In order for this to work and to set it up, your computer needs to be near the consoles or you can use a laptop/netbook. This will not work on MAC's as the software works only on Windows Vista, XP and Windows 7. The driver and software can be downloaded at here. Some other system requirements are support for Direct X9.0 or higher version of AGP video card, Pentium 4 1.8GHz or higher, Centrino 1.4 GHz or higher, 256MB RAM, USB 2.0, Harddrive space (200MB for software, 1GB or more for recording space depending on length of record and file format.
Installation is very easy. Its like any other computer program. Simply download the driver from the link above and save it to you desktop. Once downloaded, extract the file. Double click on the file named "Vbox2 Advanced DRIVER.exe". Follow the prompts and at the end, it will require to restart your computer. Once your computer has rebooted from the restart, now its time to install the software. Double click on the file named "Vbox2 Advanced.msi" which is in the same folder as the driver. Follow the prompts and at the end, it will require you to restart your computer again. Once the computer has rebooted and the installation has been installed, there will now be a new icon on your desktop.
The first time you plug in the Vbox2 Advanced to the USB port on your computer, it will pop up with a message showing "Found New Hardware - USB 28165 device" and than "Found New Hardware - Your new hardware is installed and ready to use". Typical for any USB device being used for the first time. Now that the device has been found and ready to use, you can double click on the new Vbox2 Advanced icon. Double clicking on the icon will load up the software and will display the Vbox2 Advanced splash screen and sound clip. MOST IMPORTANTLY: Before disconnecting your console from your TV, be sure to set the consoles resolution to 480i/576i or 480p/576p. This is the only way the Vbox2 will recognize the signal from the console. If you dont and you just plug the cables to the Vbox2 Advanced, you'll get nothing but static or black screen.
Once you have set the correct resolution on the console, you can unplug the component cable from your TV and plug it into the Vbox2 Advanced. To display your console on the software, you will need to click on the camcorder icon (Switch to Media Viewer Mode) under viewer. A new set of toolbar icons will show underneath. Under "Select" click on "Device Options". This will show a window with "Video Format...", "Video Setting...", "Video Source", "Audio Format..." and "Audio Capture Pin...". Select "Video Source", it will show another window with "PAL", "NTSC", "480i/576i" and "480p/576p". From here, you will select the resolution of your console.
There are so many things you can do such as record your gameplay, take snapshots of your gameplay, play in full screen. You can even save a profile with your settings.
Videos below is to show you how to set up the Vbox2 Advanced with many consoles:
Microsoft Xbox 360...
by Published on February 1st, 2011 23:16- Categories:
- Nintendo 64 News,
- DCEmu Reviews
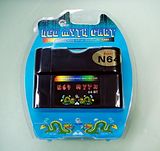
NEO N64 Myth Flash Cart SPEC v2
Manufacturer: NeoFlash
Site: Buy from IC2005
Price: $199.00
reviewed by wraggster
Overview : The Neo N64 Myth is a flash cart for your Nintendo 64 that lets you transfer games from your PC to a cart via USB. This features support for ROMs up to 512MB, all save types (it will even let you back up the saves on your PC), up to two games at the same time, and more.
Features:
- Support the N64 ROM size up to 512M
- Support all save type perfectly included the flash save, not need the same save type N64 game cart to work together
- Support 100% N64 games perfectly
- Download games from PC to NEO2 cart directly via USB port
- Upload/overwrite game save to PC via USB directly
- Multi-CIC support, can use any N64 cart to boot Neo Myth on N64 console
- Support Multi games, can download 2 games at the same time and swap the game via switch
- Can select the N64 menu run from Neo2 game cart or N64 inner menu flash (under developing still)
- Upgradeable! Support upgrade the N64 Myth cart CPLD logic core through the NDP upgrade kit
A Little about the reviewer
Ive been an emulation and homebrew fan for as many years as i can remember (since around 1996 i think) but nothing i repeat nothing is better than playing on the real hardware.
Back in the Megadrive (Genesis) and SNES days i owned a Super Wild Card and a Super Double Pro fighter, both cost about 300 pounds and ill admit that it was a great way to play games that i would never have been able to afford or because of stupid region lockouts.
So the day when Neoflash announced they were working on a Flash Cart for the Nintendo 64 called NEO Myth 64, i wanted one so badly, the chance to relive the best of the N64 and to play games I've never played was too much of a thrill to behold.
Now i must point out that being a webmaster of a homebrew site makes me no expert, I'm just as clueless as most newcomers, i like websites and i like posting news, i like to know that if i need a certain release i should be able to find it on my sites (hopefully :P).
Packaging: First off here's some screens of the N64 Flash Cart in and out its Packaging:
Front Side View in Packaging
Back Side view in Packaging
The NEO N64 Myth cart
Neo 2 Flash Cart - Which Holds SD Cards up to 8GB
The Neo n64 Myth Cart and the Neo 2 Cart split apart
The USB Lead
You also get a Mini CD with a load of Drivers on for all Neo Products.
Getting Started
The N64 Flash Cart did come with a Mini CD of drivers but sadly there was no actual drivers for the N64 Flash Cart, so first off you need to head on over to Neoflash Forum to download the latest version of the software, once you've downloaded it (15MB) then click on to install to the directory it wants to, pretty straightforward for anyone.
Clicking on the Neo 2 Ultra Menu Icon (look on your desktop or in new programs) will lead you onto a screen that looks like this:
Now get your Neo Myth N64 Flash Cart and making sure that the cart that says 512M is inserted (or the Neo 2 Card with an SD Card inserted), connect the USB Lead to the Cart and Plug it into your Laptop or PC.
It Should have no problems and automatically find drivers installed when you installed the software above, I had no problems using Windows Vista but with Windows XP Pro SP3 it wouldn't load the drivers properly, i did post a thread at Neoflash and was given instructions on how to fix this. (Try a different USB Lead it may be that)
Adding ROMS, etc.
Ok carrying on from the screenshot above if everything went ok you'll be able to start the juicy part, first off i did a quick format of the card, it took around 30 seconds to do, so no real biggie.
Next on the list was to add ROMS to the Cart (Homebrew ROMS and Emulators can be found at links Below)
Adding Roms is as easy as clicking the add ROM button and going to whereever your roms are, for some strange reason the cart/software at the moment only holds 2 ROMSbut i would think that will change in later versions of the firmware/software.
Once you have added the ROMS you require then click on N64 Burn, depending on how big your ROMS are will depend on how long it takes to copy to the cart, give it a few minutes, it also verifies each burn.
Now one thing to take into consideration is that if you have a USA N64, you will need a USA game plugged into the back of the N64 Myth Cart, If you have a Pal N64 youll need a Pal game plugged in.
I have both a USA and UK (Pal) N64 and thankfully the Power supplies/TV Leads are universal so im able to swap at pleasure.
Here's a pic of the Cart plugged into the N64
Now for Homebrew roms you dont need anything else to boot them but say you want to boot one of the games that requires the Expansion Pack
Games that need the Expansion Pack are the likes of Donkey Kong 64 and Zelda--The Majora's Mask and Perfect Dark, it also ups the resolution on many other games too.
Onto the Gaming
Ok you've burnt your games onto the Flash cart and you have the Flash Cart installed in the N64 with the correct region game in the back, now its time to turn on:
It loads automatically ...by Published on February 1st, 2011 23:15- Categories:
- DCEmu Reviews
Ultimate 2000 AX VGA-TV Converter
Manufacturer: Vtimage
Site: Buy from Goldenshop
Price: $49.99
Overview : Ultimate 2000 AX is a handed-size universal VGA to TV converter box. It supports resolution up to 1280x1024. Compact size, power from USB port, easy for carry. It is best for PC Game, PC DVD, Internet viewing on TV, Entertainment, Education and Presentation.
Features
- Pure hardware design, just Plug & Display
- No software driver required, compatible with any operation system
- Support 640x48@60/72/75/85Hz, 800x600@60/72/75/85Hz, 1027x768@60/70/75/85Hz, 1280x1024@60Hz display mode
- Switchable NTSC, NTSC-EIAJ (for Japan), PAL, PAL-M, PAL-N, PAL-combination-N and SECAM video system
- Supports Position control and MENU button
- MENU button supports HSIZE, VSIZE, BRIGHTNESS, CONTRAST, HUE, SATURATION, SHARPNESS, and OSD BACKGROUND color adjustment
- Support overscan and underscan function
- Simultaneous display on VGA monitor and TV
- Power from USB port
- 24bit, true color digitizer
- Supports IBM PC and MAC G4
- Compact form factor: 95mm(L)x55mm(W)x30mm(H)
Package Contents
- Ultimate 2000 AX (PC to TV converter box)
- User's Manual
- S-Video cable
- Video cable
- USB type power cable
- VGA cable for IBM PC & MAC G4
Quality/Usability : My video card on my PC has a VGA OUT I was able to watch movies on my 32" TV rather than my 17" PC monitor. This made viewing a lot easier for when I had company over. But having to my computer (motherboard died on me), I lost the ability to watch movies on my TV even though I am able to see my computer. So I had to look for another alternative.
Ultimate 2000 AX was that alternative solution. I tried the Ultimate 2000 AX both on my desktop as well as my IBM Thinkpad laptop that I got from my college. Installation was simple and basic. Connect a few cables whether it be VGA cables, S-Video cable or Video cable and the USB power cable and you're all set to go. Unfortunately, you'll have to play around with it as the manual that was included isnt really a manual. I had to go by the image that was printed on the back of the box.
On the front of the Ultimate 2000 AX are 6 buttons. LEFT, RIGHT, UP, DOWN, MENU and SIZE. LEFT, RIGHT, UP, DOWN are pretty much self explanatory. MENU brings up HSIZE, VSIZE, BRIGHTNESS, CONTRAST, HUE, SATURATION, SHARPNESS, and OSD BACKGROUND color adjustment. HSIZE allows you to adjust the height, VSIZE allows you to adjust the width. BRIGHTNESS, CONTRAST, HUE, SATURATION, SHARPNESS are all self explanatory. OSD Background lets you adjust the color of the text on the MENU selection to either white or black. SIZE allows you to choose various different sizes that will suit your viewing and size of TV.
The back has a VIDEO OUT to connect to TV, S-Video to connect your VCR and VGA OUT to connect to your PC monitor. The left side is VGA IN plug. On the right side of is the DC IN and a switch 1 & 2. Switch 1 & 2 lets you choose your TV standard whether it be NTSC or PAL. For NTSC, switch 1 is down (ON) and switch 2 is up (OFF). For PAL, both switches are down. Remember the "manual"? As mentioned, there was really no manual and I had to figure this out myself as when I first plugged in the Ultimate 2000 AX, I thought I did something wrong or it was broken.
Besides the lack of information in the "manual", I am impressed with the quality that is displayed. The quality is clear, colors are vibrant and the ability to adjust the size of display to fit on your TV is a great plus! This is perfect if you have movies stored on your computer and want to view it on your bigger TV. Its also great for your presentation for either work or school related. Since this only supports video, audio is still coming from your original source whether it be from your laptop or computer speakers.
Conclusion : Overall, the Ultimate 2000 AX VGA-TV Converter does its job great. At first, I was skeptic about the quality of the display coming from a no-name brand device. But after seeing this in action, I am no longer skeptic. It would have been nice if the "manual" was actually a manual rather than a piece of paper that lists product features, introduction, system requirements and package contents. Price is fairly reasonable at $49.99.
Images via comments ...by Published on February 1st, 2011 23:15- Categories:
- PSP News,
- PS3 News,
- PS2 News,
- PC News,
- Xbox 360 News,
- Nintendo Gamecube News,
- DCEmu Reviews

XCM 1080p Mega Cool VGA Box
Manufacturer: XCM
Site: Buy from Play-Asia / Buy from Divineo China / Buy from Divineo France / Buy from ConsoleSource / Buy from Amazon
Price: $79.90-120.00
Overview : Connect any Component Video source to any VGA monitor for the best resolution possible! Supports up to 1080p HDTV resolution! New sleek design.
Features :
- Supports PC video display resolutions up to UXGA (1600 x 1200 @ 75 Hz) or HD TV (up to 1920 x 1080)
- Supports 480i, 480p, 576i, 576p, 720p, 1080i, and 1080p
- Display pictures from your console (Game Cube, Playstation 2, Xbox, PSP Slim, Wii , Xbox 360, Playstation 3) on your PC monitor (up to 1600 x 1200) or HDTV (up to 1920 x 1080)
- Supports SDTV, HDTV, XGA, SXGA, and UXGA video formats.
- Works on both PAL & NTSC systems.
- Easy Plug and play installation.
- Connect any compatible YPbPr (component video) device to your VGA monitor via Integrated YPbPr to RGBHV converter.
- Applications: TFT LCD monitor, CRT monitor, Set-top box, Display projector
- Works on LCD TFT monitors
- Video output: VGA
- Automatic video source mode detection (film/graphic)
- Motion-adaptive interfiled de-interlacing
- Uses the power from your USB port, no extra power supply needed!
Quality/Usability : I dont like to have lots of wires dangling or have to constantly plug/unplug cables so I opted to use the XCM Multi-Console Component Cable v3. The XCM 1080p Mega Cool VGA Box is housed in a sturdy chrome casing with component cable input, VGA input and output, stereo speaker input and USB power input. The top of the XCM 1080p Mega Cool VGA Box contains a SOURCE button as well as directional pads. The SOURCE button lights up when in use (blue for component and green for VGA) and allows you to switch between your computer/laptop or consoles. The directional pads allows you to change resolution and frequency on your monitor.
Below is a video of the Mega Cool VGA Box being used with the Multi-Console Component Cable.
I connected my PSP Slim, Wii, PlayStation 3, Xbox 360 and Dell computer to the Mega Cool VGA Box and to my Dell 24" 1080p Widescreen monitor. All worked flawlessly without a problem. Pictures displayed just like it would on a TV/monitor. There were no lags or distortions. I liked that you were able to change the resolution and refresh rate from the VGA box rather than going through all the menus on your monitor/TV. What I dont like however is that it only supports 1 component cable. Luckily, I have the multi-console cable but others might not and this may be an annoyance.
When switching devices, it does not remember the display resolution. So you'll have to go and change it each time. Its not a big problem but would be nice if it remembered the previous setting. I like the fact that it gets it power through the USB. Having multiple consoles, TV, satellite box, computer and other devices plugged in, I am running out of sockets in the surge protector. So using a USB port from either the Xbox 360, Wii, PS3 or PC is a PLUS in my book. If you're not using that device that the VGA box is connected to, it wont be powered. So you'll have to turn it on.
Conclusion : Overall, the XCM 1080p Mega Cool VGA Box works great but as mentioned, it only allows for one component input. So if you have a PS3, Wii and Xbox 360, you can only connect one. If you want to play a different console, you'll have to unplug the cable and insert the other one. If you're like me and want to make your life easier, I suggest looking into XCM Multi-Console Component Cable v3. One cable that has all the connections for all consoles. When you want to use that console, just move the switch to that corresponding console and you're ready to go. No unplugging or plugging needed.
Would be nice if this was extended to incorporate additional component cables and turned into maybe a selector?
Images via comments ...by Published on February 1st, 2011 23:15- Categories:
- PS3 News,
- PS2 News,
- Nintendo Wii News,
- Xbox 360 News,
- Xbox News,
- Nintendo Gamecube News,
- DCEmu Reviews

XCM Universal YPbPr 1080p VGA Box
Manufacturer: XCM
Site: Buy from Play Asia / Buy from Divineo China / Buy from Amazon
Price: $59.00
Overview : A true universal VGA box compatible with the new generation consoles on todays market (Xbox 360, Playstation 3, Wii) and also with Xbox.
Compatible with both PAL and NTSC system, it is available with European or US power supply. A plug and play installation will give you Ypbpr input with all consoles, now with a 1080p resolution!
Features :
- High quality 3rd party product.
- Fully Compatible with all component devices - e.g. x-box, x-box 360, PSX3, Wii, DVD players, etc...
- Compatible with PAL or NTSC system.
- Double scan conversion (31.5KHz for NTSC, 31.25KHz for PAL,67.5KHz for 1080p).
- Output resolution ; up to 1080p
- Plug and play installation.
- Connect compatible YPbPr device to your VGA monitor.
- Integrated YPbPr to RGBHV converter.
- Supports 480p, 720p, 1080i, and 1080p.
- Applications: TFT LCD monitor, CRT monitor, Set-top box, Display projector.
- Works on LCD TFT monitors.
- Video output: VGA.
- Automatic video source mode detection (film/graphic).
- Motion-adaptive interfiled de-interlacing.
- Get the power from USB port of consoles or PC, no extra power supply needed.
- Comes with 3 component cables - PSX3, Wii & XB360.
Quality/Usability : The XCM 1080p allows you to hook up your PS3/Wii/Xbox360 computer monitor via VGA. With all the new consoles and the ability to output into high-definition, and the high costs of HDTV's, not everyone has them. But we actually do...our computer monitors.
Included in the package, you'll find the following items:
- XCM 1080p VGA box unit
- USB to USB-miniB cable
- Component cables:
- Wii (non-shielded)
- Xbox360 (shielded, includes optical digital audio connector)
- PS3 (shielded)
- Instruction booklet
Unfortunately, no VGA cable was included. This was probably due to cost factor. Had XCM included the cable, price of the product would of been higher. So to keep the price down, they didnt include the VGA cable.
Like all cables that XCM releases, they are sturdy and high quality cables. You will not be disappointed.
The VGA box itself is also sturdy and well built. The outer casing is made of opaque clear plastic. The connectors are standard quality and nothing special. Something caught my eye though. Under the VGA CARD slot, although the connection is a male connector, there was a female type connector. This connector uses the two screws similar to that when you're connecting your monitor to your video card on your PC. You can see it in the image below but on the mock up images, you dont see it. To fix this problem, simply remove the shield around it so that you can connect the cable.
Before purchasing this product, you must know that the VGA box does not change the output resolution. So you should check your monitor to see if it supports the resolution you are going to be used.
Connecting everything to the VGA box is fairly simple and is explained easily in the instruction manual. On top of the box is a switch that allows you to switch between VGA and COMPONENT. The front has a MONITOR and VGA CARD port. On the back, it has YPbPr inputs. To the left are SOUND IN, SPEAKER OUT and 480p~1080p/1080i switch. And on the right side is the USB POWER port to power the VGA box.
All images looked crisp and I didnt have a problem with any of the consoles. Just remember that the Wii can not upscale images as it is not capable of doing so.
Conclusion : Overall, the XCM Universal YPbPr 1080p VGA Box is a useful product for those who do not have HDTV. It would of been great if they included the VGA cable as the box allows you to switch video signals. So you can use video signal from your console or connect to your PC's video card to output to your monitor. Its understandable that they left it out to keep costs low. If you have an extra VGA cable around the house, you wont have to worry.
Images via comments ...by Published on February 1st, 2011 23:15- Categories:
- PS3 News,
- PS2 News,
- Nintendo Wii News,
- Xbox 360 News,
- DCEmu Reviews

DecalGirl Guitar Hero 3 Controller Skin
Manufacturer: DecalGirl
Site: Buy from DecalGirl
Price: $14.99 (available for Wii, Xbox 360 and PlayStation 3)
Overview : Dress up your Guitar Hero III Gibson Les Paul Guitar controller with a luscious, full-color guitar skin kit from DecalGirl! The brilliant, high resolution, full color design is digitally printed on premium adhesive-backed cast vinyl then covered with a clear protectant layer for the ultimate in durability! An innovative repositionable, removable adhesive means no air bubbles and a fast, easy and accurate installation. As always, the skin can be removed at any time without leaving any sticky residue! Each kit includes a head stock skin and (for Wii versions) a matching skin for the Wii remote controller.
Quality/Usability : With Guitar Hero 1 and Guitar Hero 2, you were unable to change the faceplate of the guitar. Only way to customize it was by doing it yourself with paint or other means. When Guitar Hero 3 came out, RedOctane allowed gamers to customize their guitar by being able to change the faceplates. Unfortunately, some faceplates were just hideous looking.
DecalGirl jumped on the Guitar Hero train and produced skins for the Wii and PS3/Xbox 360 guitars. DecalGirl is well-known for their high quality vinyl skins. Skins produced by DecalGirl are vibrant in color and durable. There are a lot of skins to choose from and there will be some that will catch your eyes. You can even match all your consoles such as DS, Wii, Xbox 360, etc. to have the same skin.
The Xbox 360 and PlayStation 3 guitars are similar in size and style. However, since the Wii guitar requires the Wiimote to be placed into the guitar and there is an opening in the faceplate, the Wii gets a skin for the controller as well to match. The vinyl skin comes all on one sheet. The sheet also includes the fret and fret dots.
To apply the console skin, I started with the biggest piece which was the faceplate. Considering its rounded all around, I didnt have a specific spot to start from. However, I did make sure that one side was aligned before smoothing out the remaining area. Considering the skins are fairly big, it should not be a problem applying the skin. There are a couple of ways to smooth out the skin. You can use a credit card or something similar, your fingers or a rag. I personally use my fingers first to set the skin in place and use a rag to flatten and smooth the skin out. I dont use a card because it has sharp edges/corners and if there is a small hard particle that got trapped underneath the skin, it can ruin the skin.
Applying the fret vinyl skin was also fairly easy. There are six small circles that you'll need to poke out. I started with the bottom of the fret and worked my way up (end). Once all the main pieces have been applied, you have the option of going all out and adding colored fret dot vinyl skins. There are nine colors to choose from and each has 6 dots.
Those who have the Wii version, installing the controller skin is very easy as well. Just start anywhere by matching up the corners and work your way around the controller and you should be set.
Conclusion : Overall, the DecalGirl Guitar Hero 3 Controller Skin gives the guitar a sweet look to it. Installation is very simple and clean. I love the fact that DecalGirl also includes vinyl skin for the fret and fret dots. It would of been nice if DecalGirl included maybe vinyl skins for the fret buttons as well.
Images via comments ...by Published on February 1st, 2011 23:15- Categories:
- DCEmu Reviews

Sumo Omni Bean Bag Chairs
Manufacturer: Sumo Lounge
Site: Buy from Sumo Lounge
Price: $149.00/£99 (Free shipping)
Overview :
OMNI Features:
- 10 colors to choose from
- 10 different positions
- Measures big - 4.5 X 5.5, but weighs little just 18lbs
- Space age rip-proof nylon, stays new looking easy to clean
- Filled with top quality sumo beads
Quality/Usability : I always wanted a Bean Bag chair, but I could never justify the cost to myself. You could easily buy 2 full priced games instead, and really is the couch/chair/floor really that bad?
Yes it is, compared to the Omni!
I have tried bean bag chairs before and seen their prices, and at £99 the Omni seemed to to be at the top end of the scale. But when it arrived I was surprised at the size of it, being a pessimist I thought they had used a smaller model for the PR shots. I'm not a small guy (not huge mind you) and I was very comfortable sitting many different positions in it and also laying it down flat me. It is not designed for two people but my girlfriend and I (she is smaller than me though) were comfortable on it (just about) and we could also sit side by side on it when its on its side.
It looks like a big pillow and when I read "10 different positions " I was like "whatever", but its true. I have thrown myself in the Omni many different ways and most are comfortable be it laying down, sitting upright for eating of the table (low table) or paying games.
The material is a thick, durable, comfortable nylon, that can be cleaned with a wet cloth (no stains that have not come off yet).
Unfortunately what I can't tell you (as I have only had it over a week) is how long it will keep its shape. We have all seen the old flat as a pancake bean bags, will the Omni end up the same?
Well according to their FAQ:
Does polystyrene decompress over time?
It can and it depends on usage. We use top quality high density virgin polystyrene foam. If you ever want more fill we sell it cheap at the following link: http://www.sumolounge.com/beads
Conclusion : The Omni Bean Bag Chair is by far the most comfortable and well made been bag chair I have ever seen/used, the $149/£99 price tag seems steep, but considering the quality and flexibility of the chair (and the free postage) I think its worth it.
Put it this way, a day has not passed since I got it that my butt has not been in it in some shape or form! ...by Published on February 1st, 2011 23:15- Categories:
- PS3 News,
- Xbox 360 News,
- DCEmu Reviews

Talismoon HDMI Auto Switch
Manufacturer: Talismoon
Site: Buy from Divineo US / Buy from Divineo China
Price: $29.95
Overview : Tired of Switching? Here is the solution. Talismoon HDMI Auto Switch lets you connect 3 HDMI devices to your screen and switches automatically to the device YOU want! For example, if no device is turned on and you power one on, it will automatically switch to it. Turn a second one on, and it will jump to that new device. Turn it off, it will go back to first one etc. No need to waste time finding the remote and switching back and forth all the time, the HDMI Auto Switch does the job for you.
A small (easy to hide) and smart HDMI 1.3 switch that make old HDMI switches pointless! Excellent performance characteristics allows source devices to be used with HDMI cables up to 15 meters away using AWG 28 HDMI cables at resolutions up to 1080P FULL HD!
This product is confirmed and tested to pass 1080p FULLHD and the new Dolby TrueHD and DTS-HD Master Audio loss-less audio formats found on Blu-ray.
Features :
- Compact in size (only 5cm x 5cm).
- 3 HDMI/DVI-D (hdcp) inputs.
- 1 HDMI/DVI-D (hdcp) output.
- HDCP compliant.
- No IR Remote needed.
- No Power Supply needed in most cases.
- Auto selects any active input signal from the three inputs to the single HDMI output.
- Manual selection button (for manually selecting an input if needed).
- Signaling rates up to 10.2Gbits in support of 1080P Full HD displays.
- Powerful receiver equalization to compensate for 15m HDMI cable losses.
- Pre-emphasis to compensate for PCB losses.
- Each HDMI port supports HDMI or DVI inputs.
- Dust covers provided for unused inputs.
- Smart Function (Auto Selection)
- HDMI signal to the display. As result of this functionality, user could use simple method of power off/on sources to choose the desired HDMI signal. If several sources are powered on, the last powered source will be chosen. This allows the switch to still be used with sources that are always on such as cable TV and satellite receivers.
Quality/Usability : Having my DirecTV, Xbox 360 and PlayStation 3 all hooked up via HDMI, it sometimes gets annoying and time consuming having to switch my video output between my 3 devices. Each device is connected to a HDMI port on my 32" Samsung. Luckily for me, I have 4 ports while for others, you may have 1 or 2 ports whether it be on your HDTV or computer monitor.
The Talismoon HDMI Auto Switch can help you give you additional HDMI ports and helps you switch between HDMI sources with a press of a button. As of late, I've been watching more TV than playing games so I have my DirecTV receiver plugged into INPUT1. So when a friend calls me up to hop online to play some games, all I would need to do is turn on my console and the HDMI Auto Switch will automatically select that INPUT and my console is now displayed on my HDTV. No need to go to the TV or to pick up the remote to change input. Simply turn on console and thats it. When you turn off your console, the HDMI Auto Switch will automatically switch back to the first device.
Next to the OUTPUT port, there is a small selector button. This allows you to cycle through the INPUTS if you have all 3 devices turned on. So I can have my 360, PS3 and DirecTV all turned on. I can be downloading a movie or an update on one system while playing online with the other. To check the status, I would just press the "SELECTION" button to select the input that I want to display.
The switching between inputs is fairly quick with minimal lag/delay.
Conclusion : Overall, the Talismoon HDMI Auto Switch is a great product if you have less than 2 HDMI ports on your TV or hate having to change the input on your TV. Each input port has a dust cover for when it is not in use. Its great that it automatically switches to the newest input and goes back to its original when the newest input is turned off. Its also nice that they included the ability to select your input if you have more than 1 device turned on.
Images via comments ...
- Search DCEmu
- Advert 3
 News Categories

- Links of Interest
 Sony Consoles News


- Nintendo Consoles News


- Sega Consoles News


- Apple & Android News
- Xbox Consoles News


- Open Source Consoles News
 DCEmu News Archive
- Advert
- Retro Consoles News


- PC News

- Latest DCEmu News


- DCEmu Network Sites
-
 Menu
Menu  Forum Stats
- What is the DCEmu Homebrew & Gaming Network
Catherine: Full Bodys English translation for the Vita