

 DCEmu Homebrew Emulation & Theme Park News
PSP News
by Published on February 2nd, 2011 02:23- Categories:
- PSP News
Power Bank 3 Rechargeable Battery
Manufacturer: Megacom (by Sperry)
Site: Buy from Sperry
Price: $50.00
Overview : Compact shape designed for PSP and multi-function supported: Battery(4400mHA) + Charger + Cradle, the Power Bank 3 is built in 4400 mHA Li-Polymer battery cell which is certified by UL, it can provide 3 times of regular battery life of PSP, in addaition, the Power Bank 3 is designed with advanced power management control IC, it can control the charge and discharge work efficiently and safely.
Features :
- Nice viewing angle for UMD movies, Audio and other media.
- Stylish fitting and fashion design, easy take to go and cradle playing.
- The battery pack could auto recharge PSP battery without power adaptor.
- It could be recharged by the default PSP AC adaptor, no extra power adaptor needed.
- Built-in 4400mAh (Original one is 1800mAh) li-polymer battery and people could play PSP up to more than triple regular time.
- 3 in 1 design: Cradle, Charger & Battery (4400mAh)
Quality/Usability : The Power Bank 3 is an external 4400mAh battery that attaches to the back of the PSP. With the extra power that the Power Bank 3 offers will give a good amount of extra watching and playing time on your PSP.
From the start, the PB3 comes in a box. Not those plastic blister packs that you usually see. Once you open the package, the package is separated into two parts. One half is where a black quality carry case w/zipper is stored. The other half is where the PB3 is. Inside the case, there is a little section of the pouch that you can fit either UMDs or remote/headphones. Whats cool is that you'll be able to fit the PB3 with the PSP attached. But this probably will limit the space for UMDs in the small pouch. I wouldnt suggest using the pouch to protect your PSP as there isnt much protection to the case.
The PB3 looks very well constructed and designed. Attaching the PSP to the Power Bank 3 is as easy as 1, 2, 3. It doesnt take a genius to figure out how to snap the two items together. The bottom of the PB3 has two small grooves that "clips" onto the bottom of the PSP and two little "clips" that go into the two holes at the top of the PSP. Taking it apart is easy as well as there is a little notch at the top to place your fingers to pull the PSP and PB3 apart.
At the top of the PB3, you have two light indicators. One is to show that its being used with the PSP and the other to show that it is charging. Also at the top is the DC 5V plug as well as an ON/OFF switch. The PB3 doesnt block the IR port or the USB port. It also doesnt block the UMD button but the Power Bank 3 blocks the UMD tray door from opening.
Charging the battery doesnt cause much heat at all. A full charge of the Power Bank 3 takes approximately 3 hours. Once the pack is completely charged, the battery life for the pack itself lasts approximately 7-9 hours, depending what you're using it for and for how long. With the PSP battery, its about 10-16 hours.
How does it feel? It feels pretty good in the hands. For those with big hands might feel a little better with this as it wont cramp your hands anymore. While holding it, you'll notice the weight with the PSP and PB3 attached. So holding it for a long period of time might be a little tiring. The back of the PB3 is a flat back with no bulge or anything like the PSP itself. A nice feature added to the back of the PB3 is the kickstand. This is great for when you're watching a movie and dont want to hold the PSP. This is pretty much a standard thing now with majority of battery packs or carry cases.
Conclusion : Overall, the Power Bank 3 is a great product. With the official and aftermarket 1800mAh batteries ranging from $30-$45, this battery pack is at a really good price only costing around $50-52 USD. My suggestion would be to add a small bulge to the left and right just like the PSP. This will allow better grip when held in the hands instead of a flat back. Although its easy to take the Power Bank 3 off the PSP, its a little hassle having to do that just to access the UMD door. It would be inconvenient for those who are moving around or dont have the hands to juggle everything.
Images via comments ...by Published on February 2nd, 2011 02:23- Categories:
- PSP News
Nyko PSP Play on TV Adapter
Manufacturer: Nyko
Site: Buy from Divineo France
Price: $56.00
Overview : Watch UMD movies and play PSP games on the big screen with the Play on TV Adaptor for PSP. Patented, CCD sensor technology views the image on the PSP screen and transfers it via included RCA cables to the television. The Play on TV Adaptor easily snaps onto the front of the PSP and works instantly while still allowing access to the UMD door. No complex installation or modification of the PSP is required. The device is easy to use and provides auto image adjustment allowing for the best image possible with no input required from the user. Now it is possible to enjoy all those PSP games and movies at home on the sofa in front of the TV. The Play on TV Adaptor even recharges the PSP while in use.
Features :
- Snap-on design allows you to watch UMD movies and play PSP games on TV without modifying the PSP
- High quality CCD sensor and lens combination 'tuned' to the PSP screen
- The only Patented PSP to TV technology
- Stereo audio output directly from the PSP to the TV
- Includes RCA cables for connecting to standard video-in jack on your TV
- Plug and Play - does not require user tuning, tweaking or adjustments
- Auto white balance, auto contrast and auto brightness
- Easily access UMD slot while the unit is attached
- Charge your PSP while you play
What is in the box :
- Play on TV Adapter
- Dust Cap
- AV cables
- Installation Instructions
Quality/Usability : The Nyko PSP Play on TV Adapter is a pretty solid product. As with all TV adapters for the PSP, they use a small camera and mirror to reflect the image onto the TV. Unlike the PSPonTV, the Play on TV adapter doesnt stick up and isnt close to any of the buttons on the PSP. Installing the adapter onto the PSP is fairly simple and doesnt take a genius to figure out. If you know how to hook up a VCR, a computer or just smart, you dont even need to read the instructions booklet.
The adapter clips onto the PSP at the bottom via plastic clips and is held in place via screws on top of the PSP. My complaint with this is that if you got big thick fingers, you might have a hard time trying to screw and unscrew the screw due to the back of the adapter being in the way. If you dont plan on moving the PSP or the adapter while watching of playing a movie/game, there really is no need to screw the adapter onto the PSP. Its pretty secure when its on.
Once the adapter is on, just plug the AV cable into the adapter and TV and plug the PSP AC cable into the adapter. The AC cable powers the adapter as well as charges the PSP at the same time. A nice thing about the adapter is that there is an ON/OFF switch on the side of the adapter. When the adapter is turned on, there is a blue LED light to let you know.
The adapter has two plugs on each side. One plugs into the headphone/remote jack (to transmit audio to TV) and the other into the DC port (to charge PSP).
As mentioned above, you'll be able to access all buttons on the PSP even the HOME, VOLUME, BRIGHTNESS, etc. But if you have thick fingers, you might have a hard time reaching for them.
The sound quality transmitted onto the TV is pretty good. There is no distortion or loss in quality. You may have to raise the volume either on the PSP or TV inorder to hear what is playing.
The video quality is pretty good as well. Honestly, I say its better then the PSPonTV. Colors are pretty vibrant and bright. There is some slight color washout but nothing major or drastic. I prefer to set the brightness on the PSP on medium. Low is too dark and high is just too bright on the eyes. There is no distortion or skewing of the video and it fits perfectly on the TV. Its proportional to the TV.
Conclusion : Overall, the Nyko PSP Play on TV exceeded my expectations. I was expecting horrible quality, washed out colors just like any TV adapter but Nyko proved me wrong. My only complaint is the accessibility to the screw at the bottom back of the adapter. Its a little hard to reach when you're trying to screw it onto the PSP. Also, the ability to access the front face buttons on the bottom of the PSP.
Images via comments ...by Published on February 2nd, 2011 02:22- Categories:
- PSP News
Sony PSP Chotto Shot Go!Cam Camera
Manufacturer: Sony
Site: Buy from Goldenshop
Price: $49.99
Overview : Using the PSP camera, Chotto Shot lets you edit photos and movies by adding background music, effects, and a variety of other options. Chotto Shot requires a firmware of 2.80 or above.
CAMERA FEATURES:- Digital zoom.
- Swivels to face user or away from user.
- Mic on the side of Camera.
- Night mode.
- Photos can be taken in 340x240, 480x272, 640x480 or 1280x960 resolution.
- There are 5 sound effects for when snapping a photo: the standard camera sound, a gunshot sound, some weird cartoon-like sound, a sound ressembling the uncorking of a bottle, and a sneezing sound.
- Can have a "Narrator" I guess you could say countdown how much time you have left until your automatic photo will be taken.
- "Dogwatch" feature. When set in "Dogwatch" mode you can set the camera in a desired place and when something passes it it automatically takes a photo.
- Night mode.
- Option to automatically take a photo every .5, 1, 10, or 30 seconds. It then compiles these pictures into a 15 second video.
- Option to let you take 450, 90, 15, or 4 pictures whenever you want no time limit then it compiles them into a 15 second video.
- Has a calander.
- 3 backround music's. Able to listen to while viewing photos or videos in slideshow.
- 4 special ways to go from pic-to-pic / movie-to-movie such as fade out or fade out and spin. No special way is also an option.
- 4 different times in which the photo's switch. 5, 15 seconds or 1, 10 minutes. No time is also an option.
- Option to display date when photo was taken.
The PSP Chotto Shot is one of Sony's USB peripheral device for the PSP. Their other peripheral was the Sony PSP-290 GPS Receiver. The Chotto Shot is a 1.3 mega pixels portable digital camera that was originally released in Japan and is now available in Europe under the name of Go! Edit. There is no current plans or date to release this camera in North America. By inserting the camera at the top of the PSP, you can take pictures and videos in no time. The Chotto Shot also includes a UMD software known as EDIT. The software is in Japanese. Go!Cam in Europe is in English.
With the PSP turned on, under the PHOTO XMB, you will see an option for Camera. Without the camera attached, you will be given an error message asking you to connect the camera. With the Chotto Shot attached, you can now use it. Upon selecting the Camera menu, the Chotto Shot will automatically turn on. There is a red LED next to the camera that will flash to let you know that it is on. There is no flash so you will need to be in a well lit area. You can use the Chotto Shot either with or without the EDIT UMD in the PSP. If you have the EDIT UMD in the PSP, you are given more choices and flexibility when using the camera such as timer, countdown, etc., as well as the annoying character helper on every screen but luckily you are able to turn it off. Without the UMD, you are only given the basic features.
Considering the Chotto Shot is only 1.3MP, it is on par with those of camera cell phones. Pictures are grainy when in a low light area but with a well lit place, the pictures are pretty good. You can take pictures in 320x240, 480x272, 640x480 and 1280x960. Again, quality of pictures are dependent on how well lit the subject and area is. You are able to zoom x2.0.
In Movie mode, you can record videos in 320x240 (15fps), 320x240 (30fps), 480x272 (15fps) and 480x272 (30fps). You are able to zoom x1.4. You can record as long as you want depending on the size of your memory card and how much free space is available. The bigger the card and more space you have, the longer you can record. With the announcement of the new line of Pro Duo Memory Sticks (Pro-HG): 8GB (late 2007) 16GB (2008) and 32GB (2009), the sky is the limit! That is if the PSP's firmware allows such a big card to be read and written to.
The Chotto Shot allows you tinker with the Shutter Sound as it offers you 5 different sounds and the folder number just like on a digital camera. Like camera cellphones, you have to ability to ZOOM -/+. Image quality for both camera and movie is FINE and STANDARD. You are also able to play around with the WHITE BALANCE and EXPOSURE ADJUSTMENT. Under the PHOTO mode, you are given an extra option, EFFECT which lets you play around with some effects such as SKETCH, TOY CAMERA, DISTORTION, etc.
Pressing the R trigger allows you to record movies or snap photos depending on the mode you are currently on. If you have taken any pictures or videos, pressing the L trigger will let you review your images and videos that you have taken. Pressing SELECT will swap between PHOTO and MOVIE mode.
With the EDIT UMD inserted into the PSP, you are given a few extra options. Here is a translation (taken from English Go!Cam):
MAIN MENU...
VIDEO
--------
[ ] for replay of last video. R to record. X to stop.
The option list:
SAVE
CANCEL
PREVIEW/REPLAY
CONTINUE/RESUMEby Published on February 2nd, 2011 02:22- Categories:
- PSP News

PSP Deluxe Extended Power Battery
Manufacturer: N/A
Site: Buy from Goldenshop
Price: $26.00
Overview : This Extended Power Li-ion battery is a great companion for PSP. A great solution for long time flights, hikes, and anytime you don't have to access to an AC outlet. With this external battery, you can now prolong your fun with extended game play, music play and playback anytime and anywhere you want.
Features :
- High quality 3rd party product.
- Built in Japan made high quality 2100ma rechargeable Li-ion battery - supplies power for 10 hours (including the original battery).
- No need to buy the extra charger - just use the official PSP power supply or USB power cable for recharging.
- Super small size & light weight (80g).
- Easy to fit by the side of the console.
- 3 colors available - black, white or silver.
Quality/Usability : There are so many extended battery packs available for the PSP, whether it is a bigger mAh sized battery or battery packs that attaches or dangles from the PSP.
The PSP Deluxe Extended Power Battery attaches to the bottom of the PSP. There is hook on the left side of the PSP Deluxe Extended Power Battery and a latch on the right side. Also on the right side is the charging terminal where you would insert the AC adaptor. On the bottom of the battery pack is a green LED. This is turned on when it is charging.
Inserting the battery pack is fairly easy. Simply take the hook on the left side and place it through the strap holder on the PSP. Then slide the battery up, so that the clear latch attaches to the right side of the PSP. You'll hear a click. This is to let you know that it is locked in place.
To remove, simply pull back on the clear latch so it comes off the PSP and unhook from the strap holder on the PSP.
Charging takes about 2 hours to fully charge. On a full charge and a completely dead PSP, the PSP Deluxe Extended Power Battery can charge the PSPs batter to about 80%. It doesnt completely charge the PSPs battery. With a full charged battery pack and fully charged PSP battery, I get about 10-11 hours.
Conclusion : Overall, the PSP Deluxe Extended Power Battery works nice and gives the PSP a good amount of play time. Only complaint is that the clear latch feels a bit cheap and feels like it will break if you pull back too far. Also, since the PSP Deluxe Extended Power Battery extends the bottom of the PSP, it may feel a little awkward since you're hand is use to wrapping around the PSP. Price is a bit pricey as well.
Images via comments ...by Published on February 2nd, 2011 02:22- Categories:
- PSP News
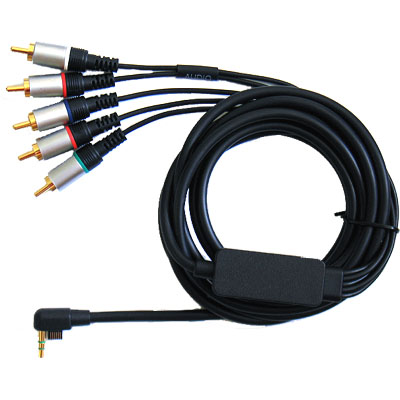
PSP Slim & Lite Component Cable
Manufacturer: N/A
Site: Buy from GameInfinity
Price: $14.95
Overview : PSP Slim & Lite Component AV Cable allows to display videos, photos and play music as well as games on TV.
Features:
- Enables AV output via Component
- Cable length: 2.5m
- Aluminum alloy housing cuts out any unwanted RF signals.
- Suitable only for the new Slim Series (PSP-2000).
- Allow you to display videos, photos and play music as well as games on TV
- For playing games, a TV with progressive scan support is required
Quality/Usability : One of the nicest additions to the PSP Slim & Lite is the video-out function that enables you to watch video, play games and view photos from your PSP on to your TV.
Following on the heals on newly released consoles are 3rd party manufacturers. The moment something new comes out...BAM! They already have products at online import stores/wholesalers. When the PSP Slim & Lite was released, component cables were hard to come by as some stores didnt receive any in stock.
The quality of the cables are decent. The biggest complaint about the PSP's video-out feature is that in order to play games, you'll need a TV that has progressive scan. If you dont have a progressive scan compatible TV, you'll be left with only looking at videos and photos.
Once you have selected the PSP's output setting, the image displayed on the TV does not fill it completely but is bigger than we expected. On my 32-inch LCD, it measured approximately 22-inches. Although this can be bothersome or nitpicking to some, once we got into the gameplay, we didnt really notice the size of the display compared to the TV.
Images were a little different and washed out compared to that of what is shown on the PSP screen. Taking a small image that is use to being displayed on the PSP's screen and blowing it up onto a monitor, you'll notice the jaggies on objects and textures. This is probably due to the fact that you're also sitting close to the TV as the length of the cable isnt really long to begin with.
Conclusion : Overall, the PSP Slim & Lite Component Cable works well for an aftermarket product. Colors and images could use better quality. The noticeable jaggies was expected since you're scaling up an image. The price tag of $14.95 is fairly reasonable as its only $5.00 less than the official cables.
There is also a video showing the XCM 1080p VGA Box allowing you to hook up the PSP Slim component cable and be able to play on a VGA monitor. You can read the news here and our full review on the XCM 1080p VGA box here.
Images via comments ...by Published on February 2nd, 2011 02:22- Categories:
- PSP News

PSP Slim 2000 Series Component Cable
Manufacturer: DragonPlus
Site: Buy from Goldenshop
Price: $10.00
Overview : PSP Slim 2000 Series Component Cable allows to display videos, photos and play music as well as games on TV.
Features:
- High quality 3rd party product.
- Enables component AV output.
- Extra long cable.
- Suitable only for the new Slim Series (PSP-200X).
- Allow to display videos, photos and play music as well as games on TV.
- For playing games, a TV which supports progressive scan is required.
Quality/Usability : DragonPlus has entered the PSP Slim scene with their own Component Cable. DragonPlus is well-known for their 3rd party peripheral in the videogame industry.
Like majority of DragonPlus products, the quality of the cables are sturdy. The biggest complaint about the PSP's video-out feature is that in order to play games, you'll need a TV that has progressive scan. If you dont have a progressive scan compatible TV, you'll be left with only looking at videos and photos.
Once you have selected the PSP's output setting, the image displayed on the TV does not fill it completely but is bigger than we expected. On my 32-inch LCD, it measured approximately 22-inches. This seems to be how the PSP outputs as another PSP Slim component cable that was reviewed also has the same result.
Images were a little washed out compared to the screen on the PSP screen but the images were still viewable and clear. There were jaggies but this is expected since you're taking a small image and stretching it to fit the screen.
Conclusion : Overall, the PSP Slim 2000 Series Component Cable worked well. There wasnt any big complaints except for the minor washed out colors and the noticeable jaggies was expected since you're scaling up an image. For $10.00, the price was very reasonable.
There is also a video showing the XCM 1080p VGA Box allowing you to hook up the PSP Slim component cable and be able to play on a VGA monitor. You can read the news here and our full review on the XCM 1080p VGA box here.
Images via comments ...by Published on February 2nd, 2011 02:22- Categories:
- PSP News
Camy Pro Gear Dual Injection Faceplate
Manufacturer: Camy
Site: Buy from DecalGirl
Price: $24.99
Overview :
Dual Layered Special Edition
We are immensely proud of our brand new Special Edition Dual Layered PSP faceplate. With two cool looking designs on the pearl black double injection PSP it not only fits perfectly on your PSP like the original but also brings a brand new feel to it by adding a unique look separating you from the masses!
Twin Dragons
Enter of the Dragons! This beautifully crafted “Twin Dragons design is a collaboration of our US and UK designers. Sleek lines and sharp Silver or Gold colors accent this design with the “original” pearl black PSP faceplate back drop.
Hell Skull
The Hell Skull design incorporates Japanese and American styled art; blended into a truly unique piece of PSP accessory. This design also comes in Gold or Silver with pearl black PSP faceplate back drop.
All Dual Layered S.E. CAMY PRO GEAR FACEPLATES comes in our highly sorted after “retail pack”. Finely crafted, these packs are ready for your online or retail store. The retail pack includes the following:
- Clam shell packaging
- Custom Dual Layered PSP faceplate
- Screw driver
- Spare Screws
- All buttons
- Detailed Full Colored Installation Instructions
Quality/Usability : Camy International has entered the PSP market with their own faceplates. You must think that its just an ordinary aftermarket faceplate. Yes, thats true but these are different. How so? Well, these faceplates are "Dual Injected". What is "Dual Injected" you might ask? First off, these faceplates have designs on them and not the usual solid color faceplates. Secondly, the quality the design is the same as that of the original PSP faceplates made by Sony. This means that there are two separate layers, one with the design which is actually on the outside (not inside as some suggested) and the other is a clear coating to protect the design from coming off.
The packaging looks professional and is sealed all around unlike some accessories out there that uses a latch or cheap seal. Inside the packaging, you have the faceplate, screwdriver with magnetic tip, spare screws in case you strip the original screws, entire button set and instruction manual.
The instruction manual is easy to understand. But its always good to have other sources for instructions on how to dismantle the faceplate such as IGN.
Installing the faceplate is easy. Installation can take about 15-20 minutes, depending how fast you work and how careful you are. I took my time as I'm anal and a perfectionist when it comes to these things. One little dust particle would irk me. Not to mention, I'm not really the type of person to open up my system and do these modifications since I'm not all that handy with tools. So, if I can do it so can you! There is a problem though. Once you have the faceplate on and everything put back together, you might experience a problem with the UMD tray. It wont close. To fix this problem, you will need to modify the case a little by shaving off some of the plastic using either a dremel or x-acto knife.
Its nice that the screwdriver included has a magnetic tip. Easy for getting those screws out and whats also nice is that they include spare screws. I personally used my stock buttons rather then the ones that came with the faceplate because the buttons that came with the faceplate left gaps. But both stock and aftermarket buttons fit fine.
I dont know if it was already on the faceplate or if I caused the problem even though I used a microfiber cloth to clean the screen but I noticed some swirly scratches. I dont know if its on the inside or outside. But it can be an annoyance when playing with your PSP.
Conclusion : Overall, the Camy Pro Gear Dual Injection Faceplates is a nice faceplate. From the craftsmanship to the quality, its top-notch all around but the UMD tray situation is a big problem. The designs of these faceplates are also nice looking as well and will definitely turn some heads. The Dual Injection Faceplates are roughly $5 less than the Official Sony PSP Faceplates. Although, Camy does not have a online store, you can purchase from DecalGirl as they are the Official sellers for Camy. Hopefully the bad batches that were sent out are not the actual retail packages sent to sellers. If not, would there be a replacement in place? If it wasnt for that problem, this would be the best faceplate.
*UPDATE* - 2/22/07
I contacted Camy regarding the problem with the faceplate preventing the UMD door from closing and here is their response:
Hi, we are aware of that problem and it is fixed in the final retail version.
So it seems they are aware of the situation and the batch we got was not the final retail version but looks it. Camy is nice enough to send us updated faceplates. We will update once we receive the retail version faceplates.
Images via comments ...by Published on February 2nd, 2011 02:22- Categories:
- PSP News

DecalGirl PSP Skin Kit (Slim & Lite)
Manufacturer: DecalGirl
Site: Buy from DecalGirl
Price: $9.99
Overview : DecalGirl PSP Slim skin kits covers the front and back of the new PSP Slim, completely wrapping the area around the directional control as well as exposing the openings for the speakers and LED lights. Printed at art-quality resolutions on premium grade cast vinyl then covered with a clear protective coating, our full-color PSP Slim skins use an innovative, patented repositionable and removable adhesive backing for fast, easy and accurate installation and goo-free removal! Includes a download code to get a free matching wallpaper for a seamless look!
Quality/Usability : One of the biggest faults of the PlayStation Portable (PSP), is that it attracts and shows finger prints easily due to its shiny gloss. DecalGirl not only attempts to prevent fingerprints but also prevent scratches and add a new refreshing look to your PSP. Hey, who likes to be generic? Why not stick it from the rest of the PSP crowd with a new look without modifying your PSP?
The PSP Slim & Lite skin kit comes on one sheet. The skin contains both the front and back skin for the PSP Slim. The front contains one big vinyl skin. There are also skins for the buttons if you decide to use them. The back contains three skins (battery door cover, UMD door, right).
To apply the console skin, I simply started with the front face skin. Since the skin has holes cut out for the LEDs and speakers on the PSP, it would be easier to measure and apply the skin. You'll need a sharp object or pen to punch out the small vinyl cut outs that are not needed. I worked my way from the WLAN/Memory Stick LED lights to the middle to make sure the skin went around the bottom buttons and Power LED/Hold. Once the bottom half has been applied, I worked my way up by smoothing it out. Like with all my portable devices whether it be the PSP, Nintendo DS, MP3 players or cellphones, I have a screen protector. Since I have a HORI screen protector on my PSP, the skin kind of overlaps the screen protector. This is a good thing and bad thing because it prevents tiny particles of going under the screen protector but if I need to remove it for whatever reason, I would have to remove skin as well. If I placed the screen protector on top of the skin, the corners of the screen protector would stick up and attract dirt.
The back is very very easy as there is nothing in the way. Just line up the corners and simply smooth it out. There are a couple of ways to smooth out the skin. You can use a credit card or something similar, your fingers or a rag. I personally use my fingers first to set the skin in place and use a rag to flatten and smooth the skin out. I dont use a card because it has sharp edges/corners and if there is a small hard particle that got trapped underneath the skin, it can ruin the skin.
Whats great about the DecalGirl PSP Skin Kit (Slim & Lite) is that it comes with matching background wallpaper to match your vinyl skin. The code is on the skin itself. To get your wallpaper (you'll need access code), simply go to GetMyWallpaper. Get your wallpaper and load it onto your PSP just like transferring any file.
Conclusion : Overall, the DecalGirl PSP Skin (Slim & Lite) fits perfectly with the PSP Slim & Lite. Like all DecalGirl skins, its easy to clean, easy to remove and it wont leave any sticky residue. If you mess up a section, you can simply lift it up and reapply it. Some other skins on the market, either leave residue on your device once removed or if you mess up, it wont look good when reapplied. Its great that DecalGirl included a matching background wallpaper.
DecalGirl also makes skins for the original PSP, so people who still have the phat, you're not left out.
Images via comments ...by Published on February 2nd, 2011 02:22- Categories:
- PSP News
ZAGG invisibleSHIELD PSP Slim Lite
Manufacturer: invisibleSHIELD
Site: Buy from invisibleSHIELD
Price: $19.95 (full body coverage); $9.95 (screen coverage)
Overview : Your search for a(n) Sony PSP Slim case, skin, or cover is now over. The invisibleSHIELD™ is an exceptionally clear and virtually indestructible film that will protect your PSP Slim from unsightly scratches. Our exclusive nano-memory™ technology covers and shields your device, keeping it as pristine as the day you took it out of the box.
The precision pre-cut invisibleSHIELD applies directly to your PSP Slim, providing the toughest, most durable protection you will find. The invisibleSHIELD has its origins in the military, where it was used to protect high-speed helicopter blades from dust, dirt and debris. Now you can use that same powerful technology to protect your PSP Slim.
The invisibleSHIELD is only .2 millimeters thick making it the slimmest PSP Slim skin or PSP Slim cover of its kind. It is so tough that we back it with a lifetime guarantee. So, if it ever does wear or scratch, we will replace it for free, for the life of your device. And if you ever need to remove the invisibleSHIELD, no problem; it comes off clean and leaves no sticky residue.
If you're still not convinced, check out our demo video and see for yourself how strong the invisibleSHIELD™ really is.
Features:
- Scratch Proof
- Lifetime Guarantee
- No added bulk
- Improves grip
- Invisible protection
Quality/Usability : With the new release of a smaller and slimmer PSP, I had to jump on it. I loved the original PSP and with the new PSP being slimmer and lighter, it also came in different colors other than black. Granted, the original PSP had black and white (Japan only). In the US, you have black and silver.
Having owned the phat silver DS, I was afraid that the silver PSP my succumb to the same paint chipping. So to protect my investment, thats where invisibleSHIELD comes in. You've probably have either heard of invisibleSHIELD or seen some form of their advertisement such as key scratching ipod, pen trying to go through invisibleSHIELD. They protect everything from your precious iPods, to cellphones to cameras and even your Macbook.
invisibleSHIELD comes in a cardboard box. The box opens up like a tri-fold wallet/folder. On the left side pocket, it holds the invisibleSHIELD (3 sheets) and generic instructions on a piece of paper. The middle also contains generic instructions but printed on the box. The right side holds the squeegee at the top and SHEILDspray at the bottom. The SHIELDspray is just plain water.
I've installed numerous DecalGirl skins on consoles and they were easy. Even if you messed up, peeling and reapplying was easy. So applying the invisibleSHIELD should be an easy walk through the park. Considering the size of the pieces, installation is fairly simple. First, I started off with the front faceplate. They suggest washing your hands so that your fingerprints arent all over the sticky side of the invisibleSHIELD. Next, spray your fingerstips with the SHIELDspray (its basically regular water) and peel the invisibleSHIELD off the paper backing. Once peeled off, hold the invisibleSHIELD in your hands with the adhesive side up. Lightly spray the front (instructions states to spray back also, why? I dont know) of the invisibleSHIELD. DO NOT spray on the PSP itself. Once you have applied water to the invisibleSHIELD. Apply it to your PSP and slide it into place. I lightly sprayed water onto the invisibleSHIELD as there are crevices on the PSP that I do not want water going into. Use the squeegee to push the excess moisture and bubbles away from the center and any openings to the edges. You have to becareful around the buttons, speakers and any open areas. The screen was easy to apply since the faceplate invisibleSHIELD is already in place.
The back contains 4 pieces. One for each side, UMD door and inner circle (PSP logo). I did not use water for this as the pieces were smaller and easier to apply.
Since I'm a perfectionist and a bit anal when it comes to things like this, I didnt have to do much re-adjusting unlike the Macbook invisibleSHIELD. Do remember that when you're peeling the invisibleSHIELD off, the invisibleSHIELD can stretch making it bigger than its suppose to be.
Conclusion : Overall, the ZAGG invisibleSHIELD PSP Slim Lite protected the PSP very well. It covered all of the front and back. The full coverage will cost you $19.95 and the screen only costs $9.95. I personally prefer HORI screen protectors as clings on by static, easy to clean/apply and costs half as much. Although the instructions are generic and the same for all their products, the process is all the same just shaped differently. just But those afraid of getting their PSP scratched should check out invisibleSHIELD.
The Lifetime Guarantee unfortunately only covers the product. They claim its scratch resistant, so if it scratches, they'll replace it. If you mess up, thats ...by Published on February 2nd, 2011 02:22- Categories:
- PSP News
XCM PSP Slim Lite Faceplate
Manufacturer: XCM
Site:
Price: $24.99-$27.99
Overview : This ultra high quality faceplate is just what you need to spice up your Sony PSP Slim console! Using a special process to make the faceplate extra smooth, its labeled as the "Smooth as Silk" series from XCM. Using only the highest quality plastic this unique faceplate is sure to please.
Included :
- Comes with 2 sets of replacement fire buttons with different patterns on each.
- Includes 2 Screwdrivers to open your Sony PSP Slim.
- Easy to Install - 10-15 minute installation.
Quality/Usability : Below are two videos on how to remove the faceplate from your PSP Slim and how to install the XCM PSP Slim Lite Faceplate:
(by removing the faceplate, you void you warranty. DCEmu Reviews and DCEmu Networks is not responsible for any damages that user may have caused)
Remove faceplate
Installation
Since the videos above pretty much did all the writing for me on removing and installing the faceplate, I'll talk about the quality and how the pieces fit in place.
The quality of the faceplate is top-notch like all other XCM products. However, I'm not fond of the aftermarket buttons. I never was. They have always felt cheap to me. The XCM PSP Slim Lite Faceplate included two different button pads. Both have different designs. One is dotted to the design of the designated buttons (triangle, X, circle, square) and the other has designs on it. A PlayStation controller acts as the triangle, Xbox logo as the X, UMD disc as the O and a PSP as the square. Having tried both, it seems that one is better than the other. I preferred the one that was dotted but the square button didnt protrude out of the faceplate like it should. But with the other button pad with the system icons, it popped out fine.
Conclusion : Overall, the XCM PSP Slim Lite Faceplate is great for modders. The quality is sturdy but the buttons feel cheap. The square on one of the button pads didnt seem to pop out of the faceplate so playing with the PSP would be troublesome. The smoke and crystal would be my top two choices as its clear and the LED would come through the case.
Images via comments ...- Search DCEmu
- Advert 3
 News Categories

- Links of Interest
 Sony Consoles News


- Nintendo Consoles News

- Sega Consoles News


- Apple & Android News
- Xbox Consoles News


- Open Source Consoles News
 DCEmu News Archive
- Advert
- Retro Consoles News


- PC News

- Latest DCEmu News


- DCEmu Network Sites
-
 Menu
Menu  Forum Stats
- What is the DCEmu Homebrew & Gaming Network
Catherine: Full Body’s English translation for the Vita